


Hi, how can we help?
Articles
Add new user 👤➕
Your community is growing, and Gumb makes it a breeze. Here are three simple ways you can add or invite members to your group.
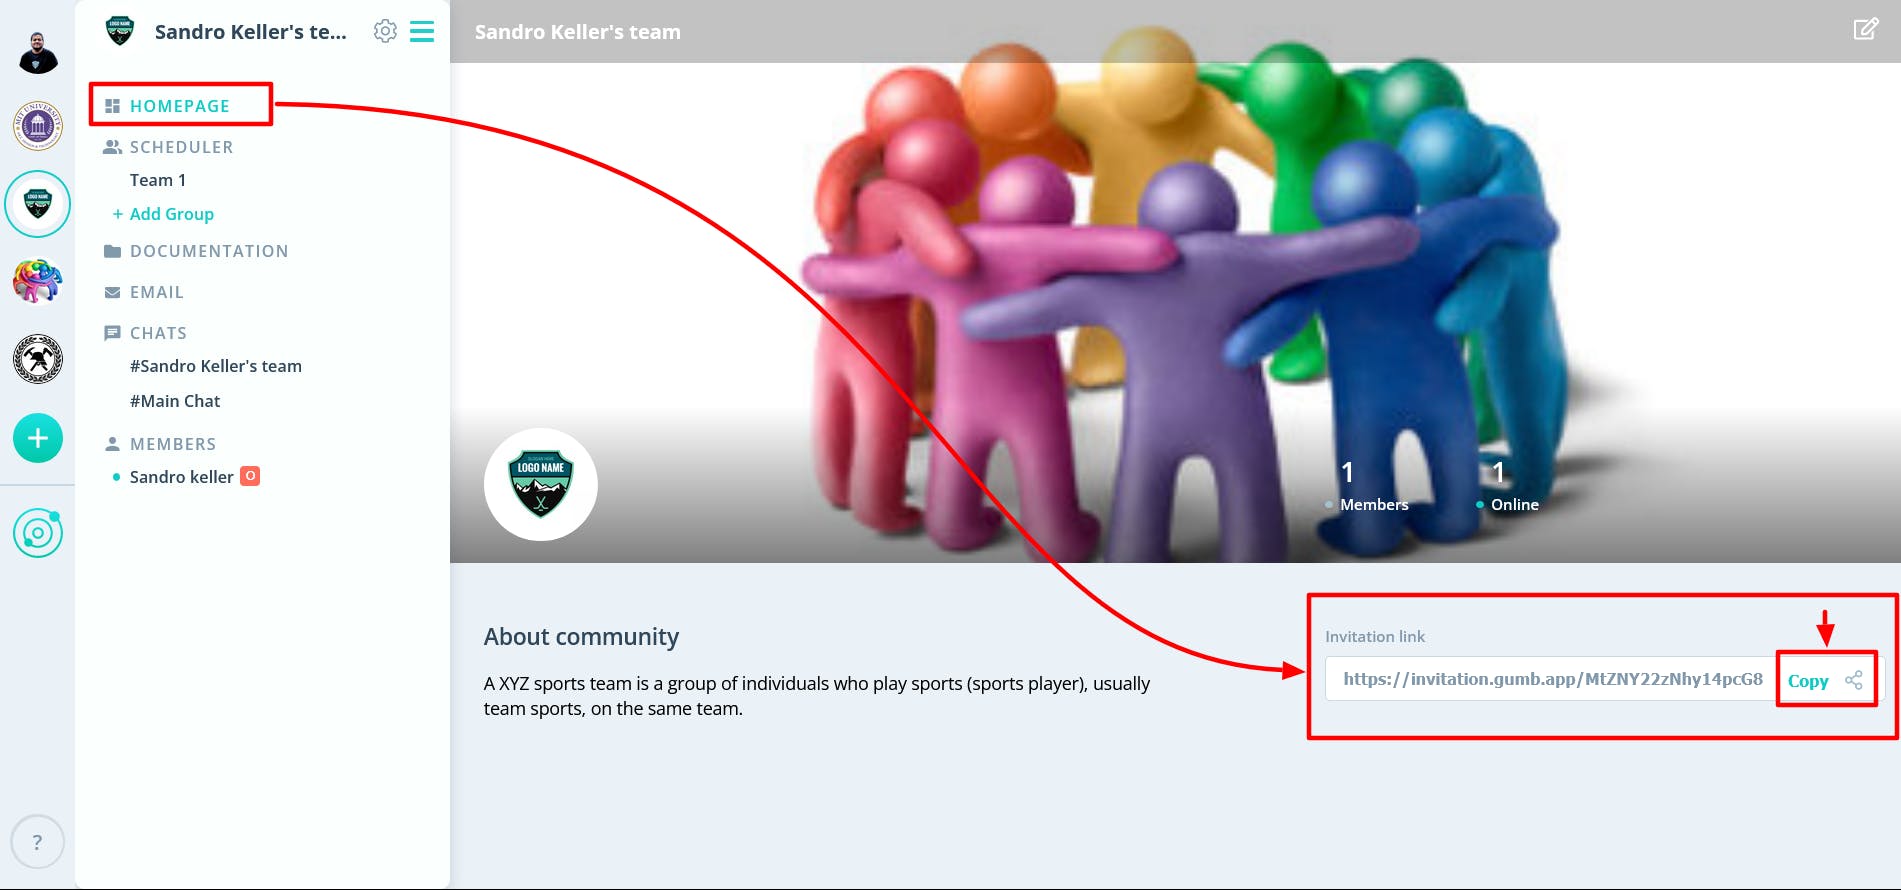
To add a new member, head over to the Members section and click on the '+'. Alternatively, go to Settings ⚙, choose 'Members' and click on 'ADD USER'.
1 Invite using the Community Link:
Steps:
- Admins copy and share the community link.
- Members with a Gumb account can click on 'Join Community'.
- Those not yet registered on Gumb should sign up first. Once done, they can click the link again to join the community.
Note: Newcomers without a Gumb account will be directed to sign up. After logging in, they should click the community link once more to send a join request.
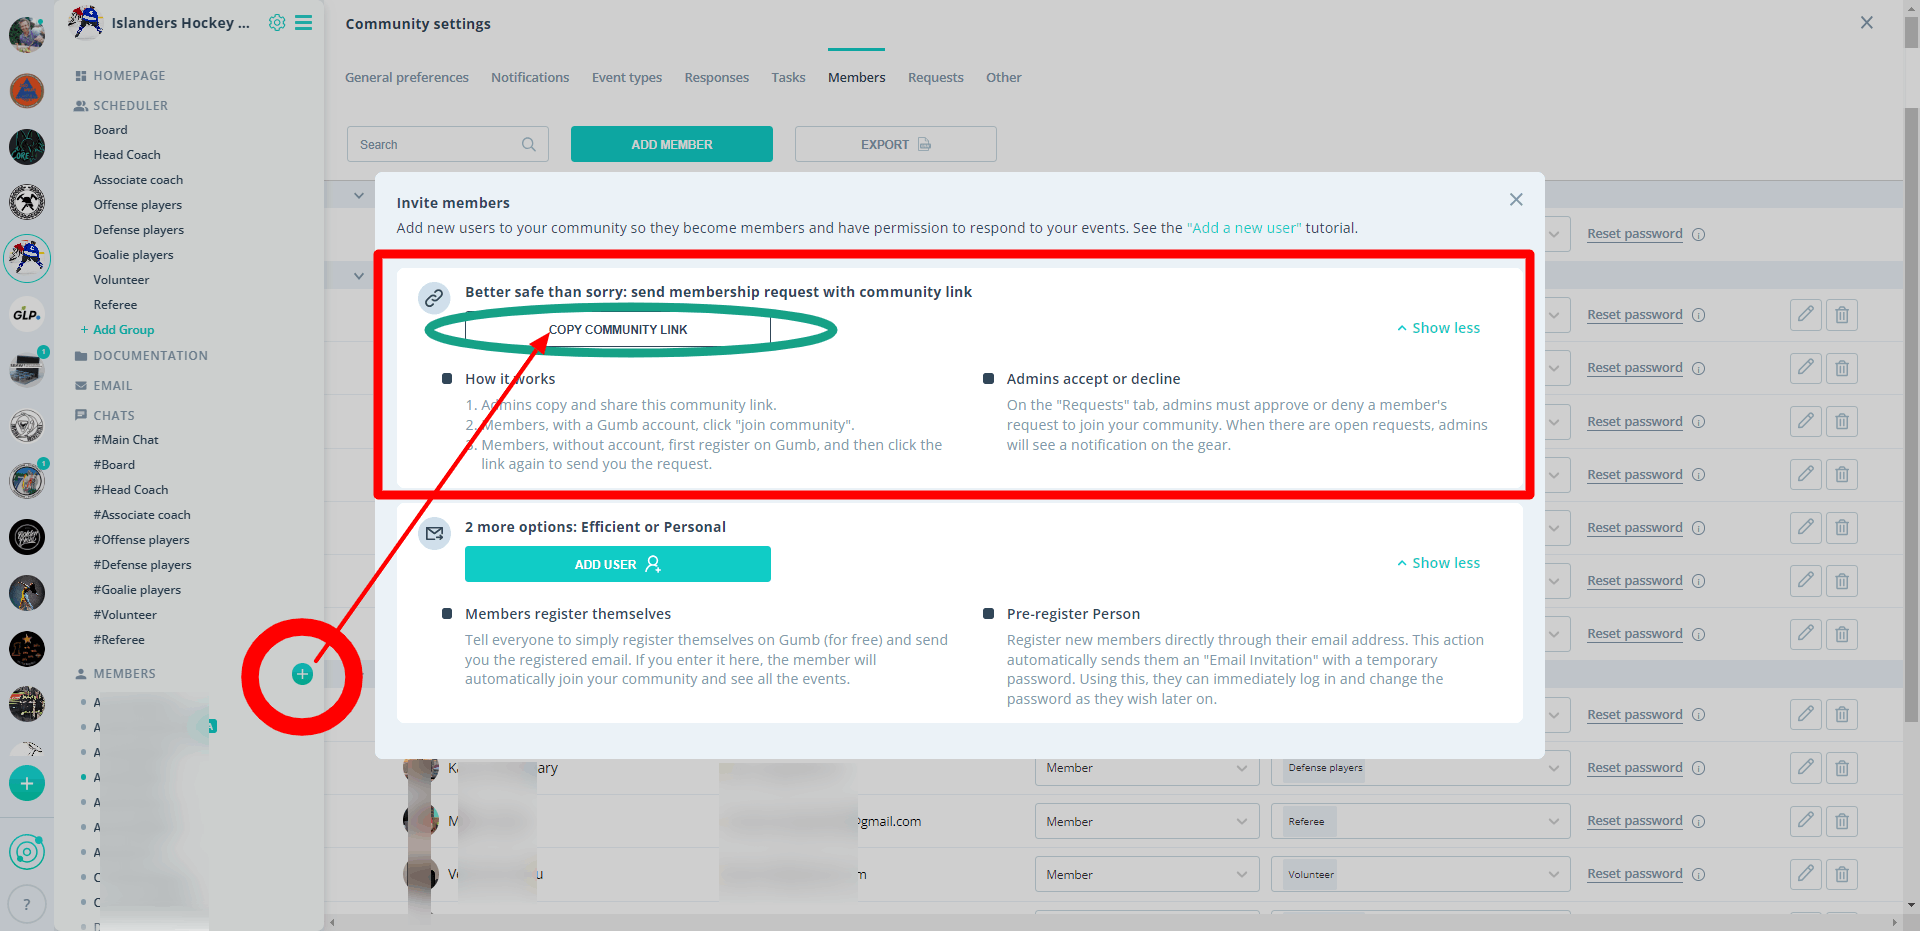
Admin’s Job:
- Admins will see all join requests under the 'Requests' tab. You can accept or decline these requests. Any open requests? You'll get a notification at the ⚙ icon. Learn more: Manage Membership Requests 👤🚪
2 Members Register Themselves:
Steps:
- Your team members sign up on Gumb. For assistance, you can share the Create your account 💁🏻 guide.
- Once registered, they'll let you know their email.
- Then, you can add them to your community using 'Add New User'.
Note: If their email is already recognized by Gumb, they'll show up in your overview and can immediately respond to your events.
Tip: Remind your members that signing up on Gumb is as straightforward as any other app. Most are already familiar with the process (register email and then confirm for verification). Encourage them to sign up and send you their email. This seamless approach saves time for both of you.
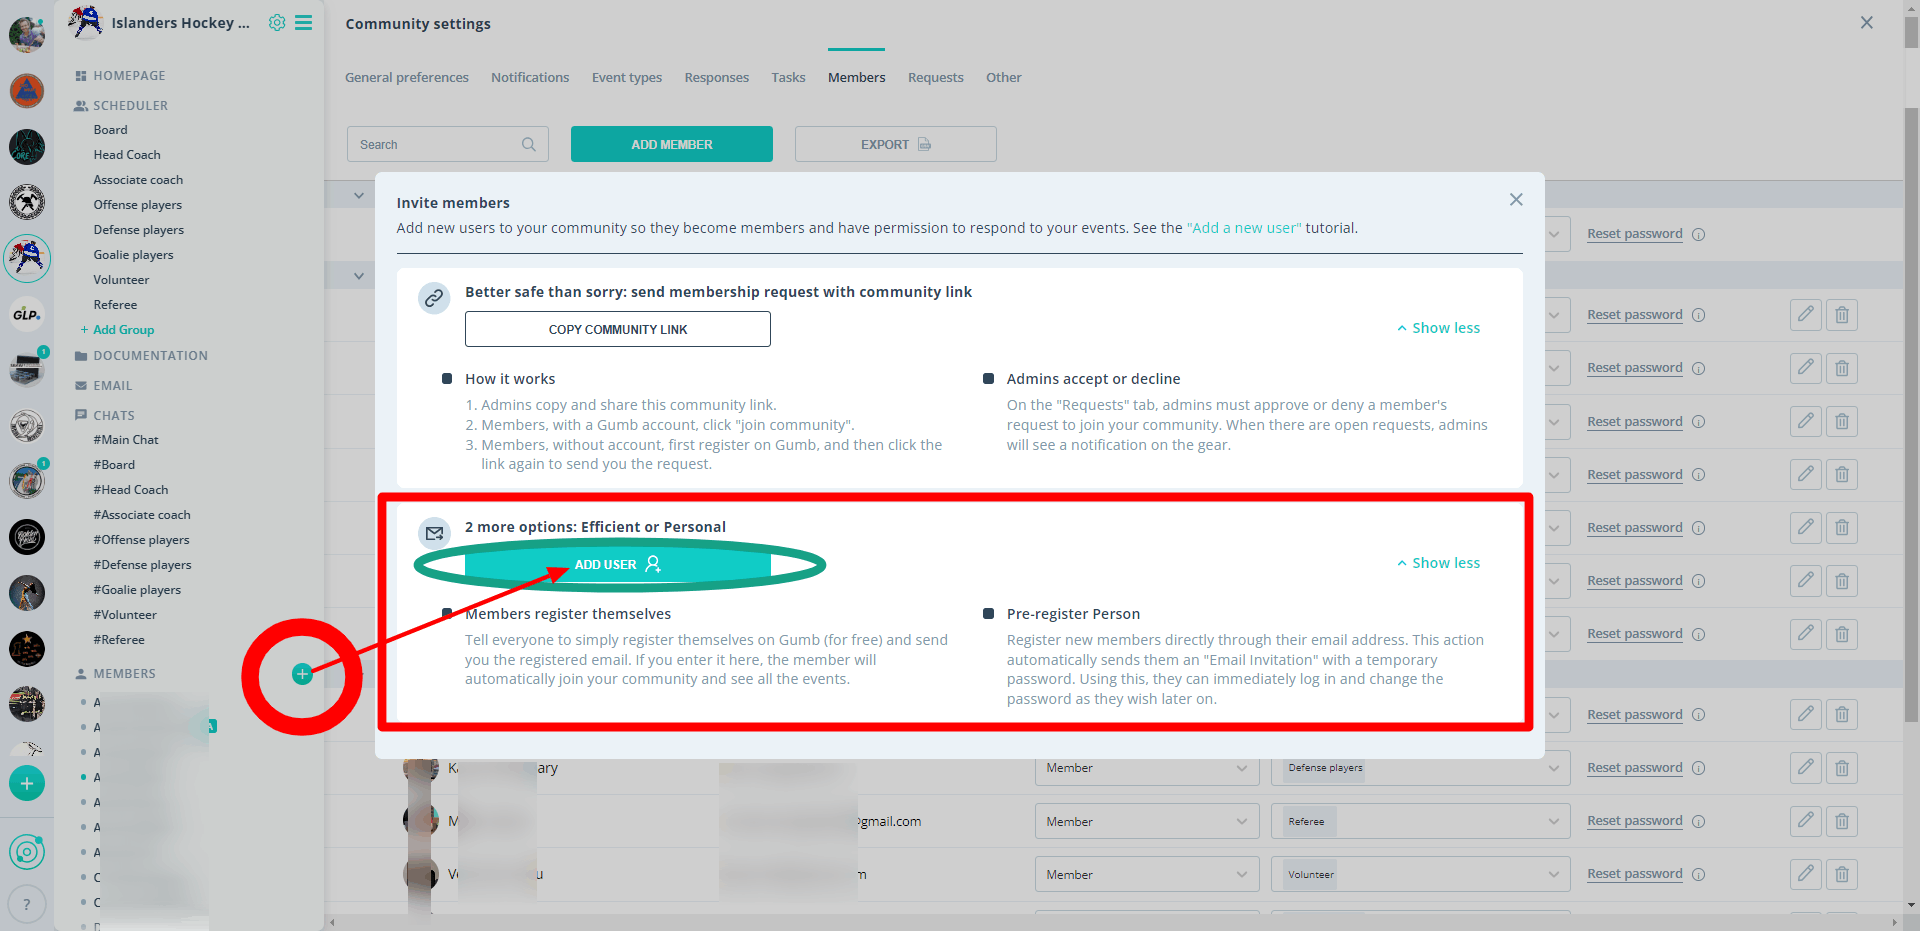
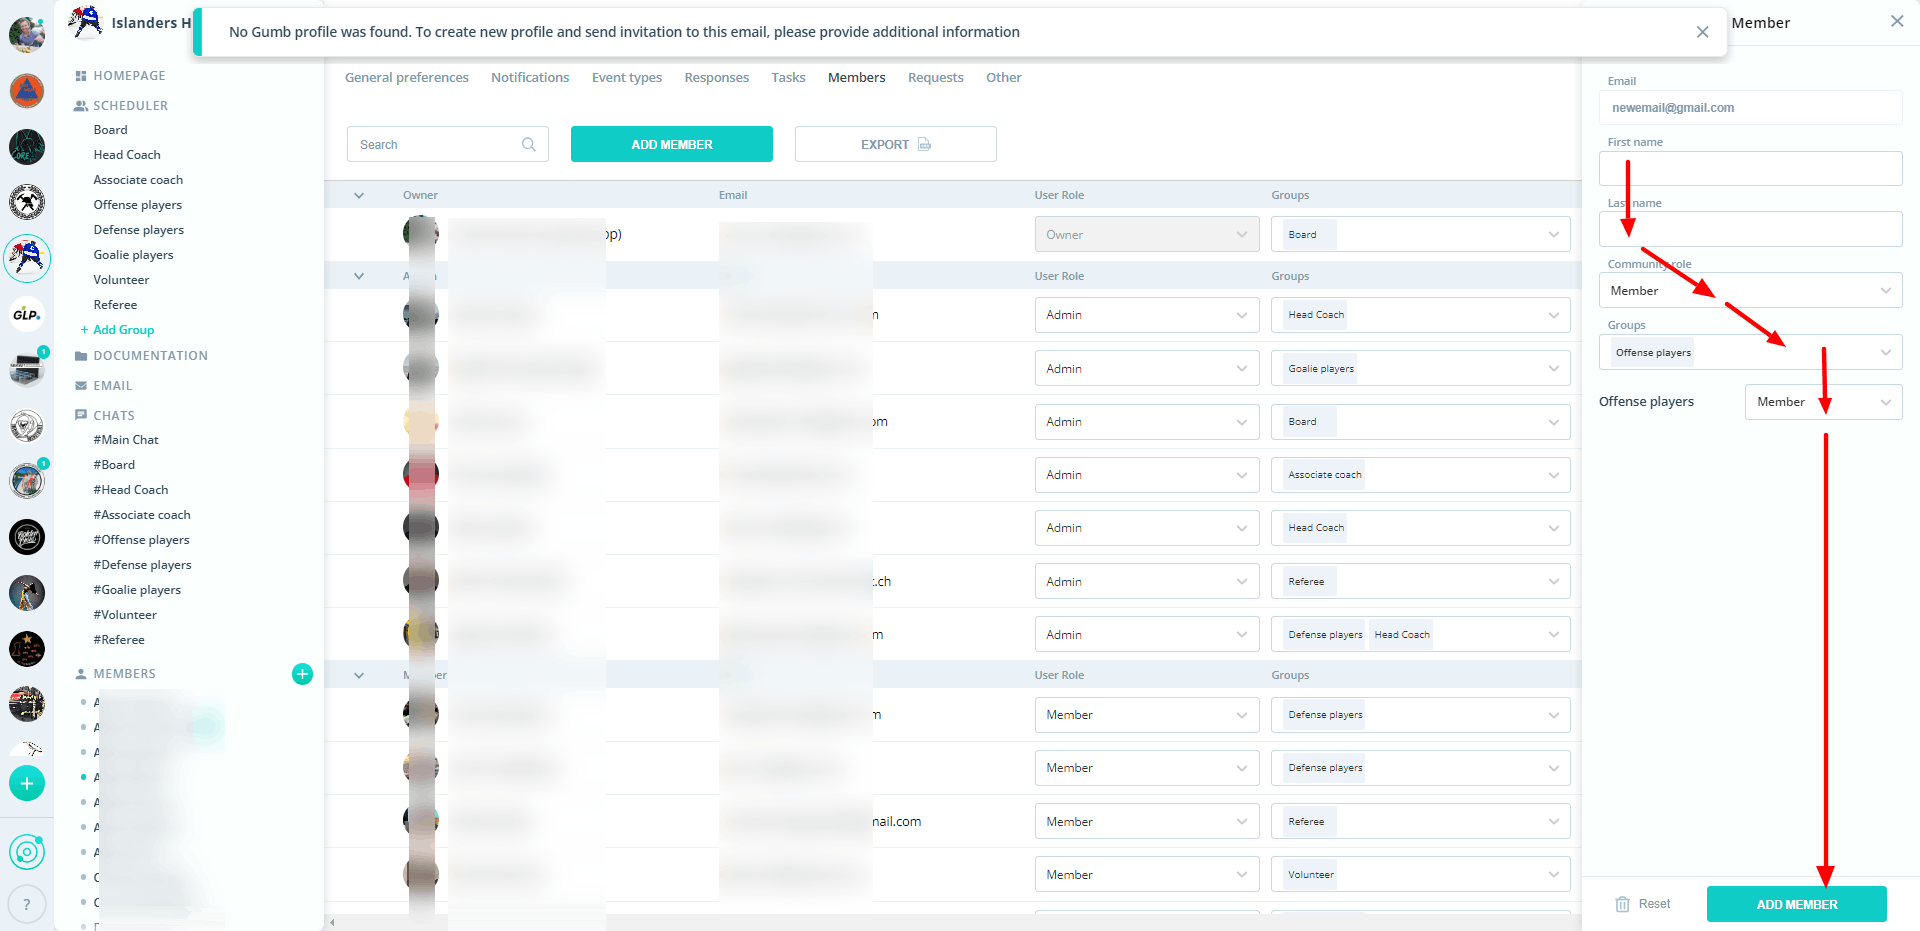
3 Pre-register Members:
Steps:
- Click on 'ADD USER' and enter the member's email. If it's new to Gumb, you can add their first and last name, group, and role (changes can be made later).
- Once saved, Gumb sends an automatic invitation with a temporary password.
- The member logs in using this password.
- On their first login (or anytime after), members can change their password.
Note: The invitation might land in Spam. So, better check there too!
With Gumb, you can effortlessly bring in members, even if they haven’t used the platform yet. Register their details in advance, and they'll be ready to roll as soon as they log in.
Key Points:
- Cost for Members?
Nope. When activated by a subscription holder (community owner), Gumb is free for members. Details under My subscription 💵
- Need a Word Template?
We got you! We have a customizable template. You can adapt it for your website or share with members. Just email support@gumb.app with your details.
- Having Issues?
If there’s any trouble or multiple incorrect password entries, email us at support@gumb.app with the member’s email. We'll reset the account to allow a fresh login.