
For Admins
Member Administration 👤⚙️
Manage Members with Ease
Gumb gives you a central, easy way to manage all your community members. From adding new members to editing profiles, you'll find all the instructions and information you need right here.
Add Members 👤➕
Missing members or want to add new ones?
- How to: Add New Users 👤➕
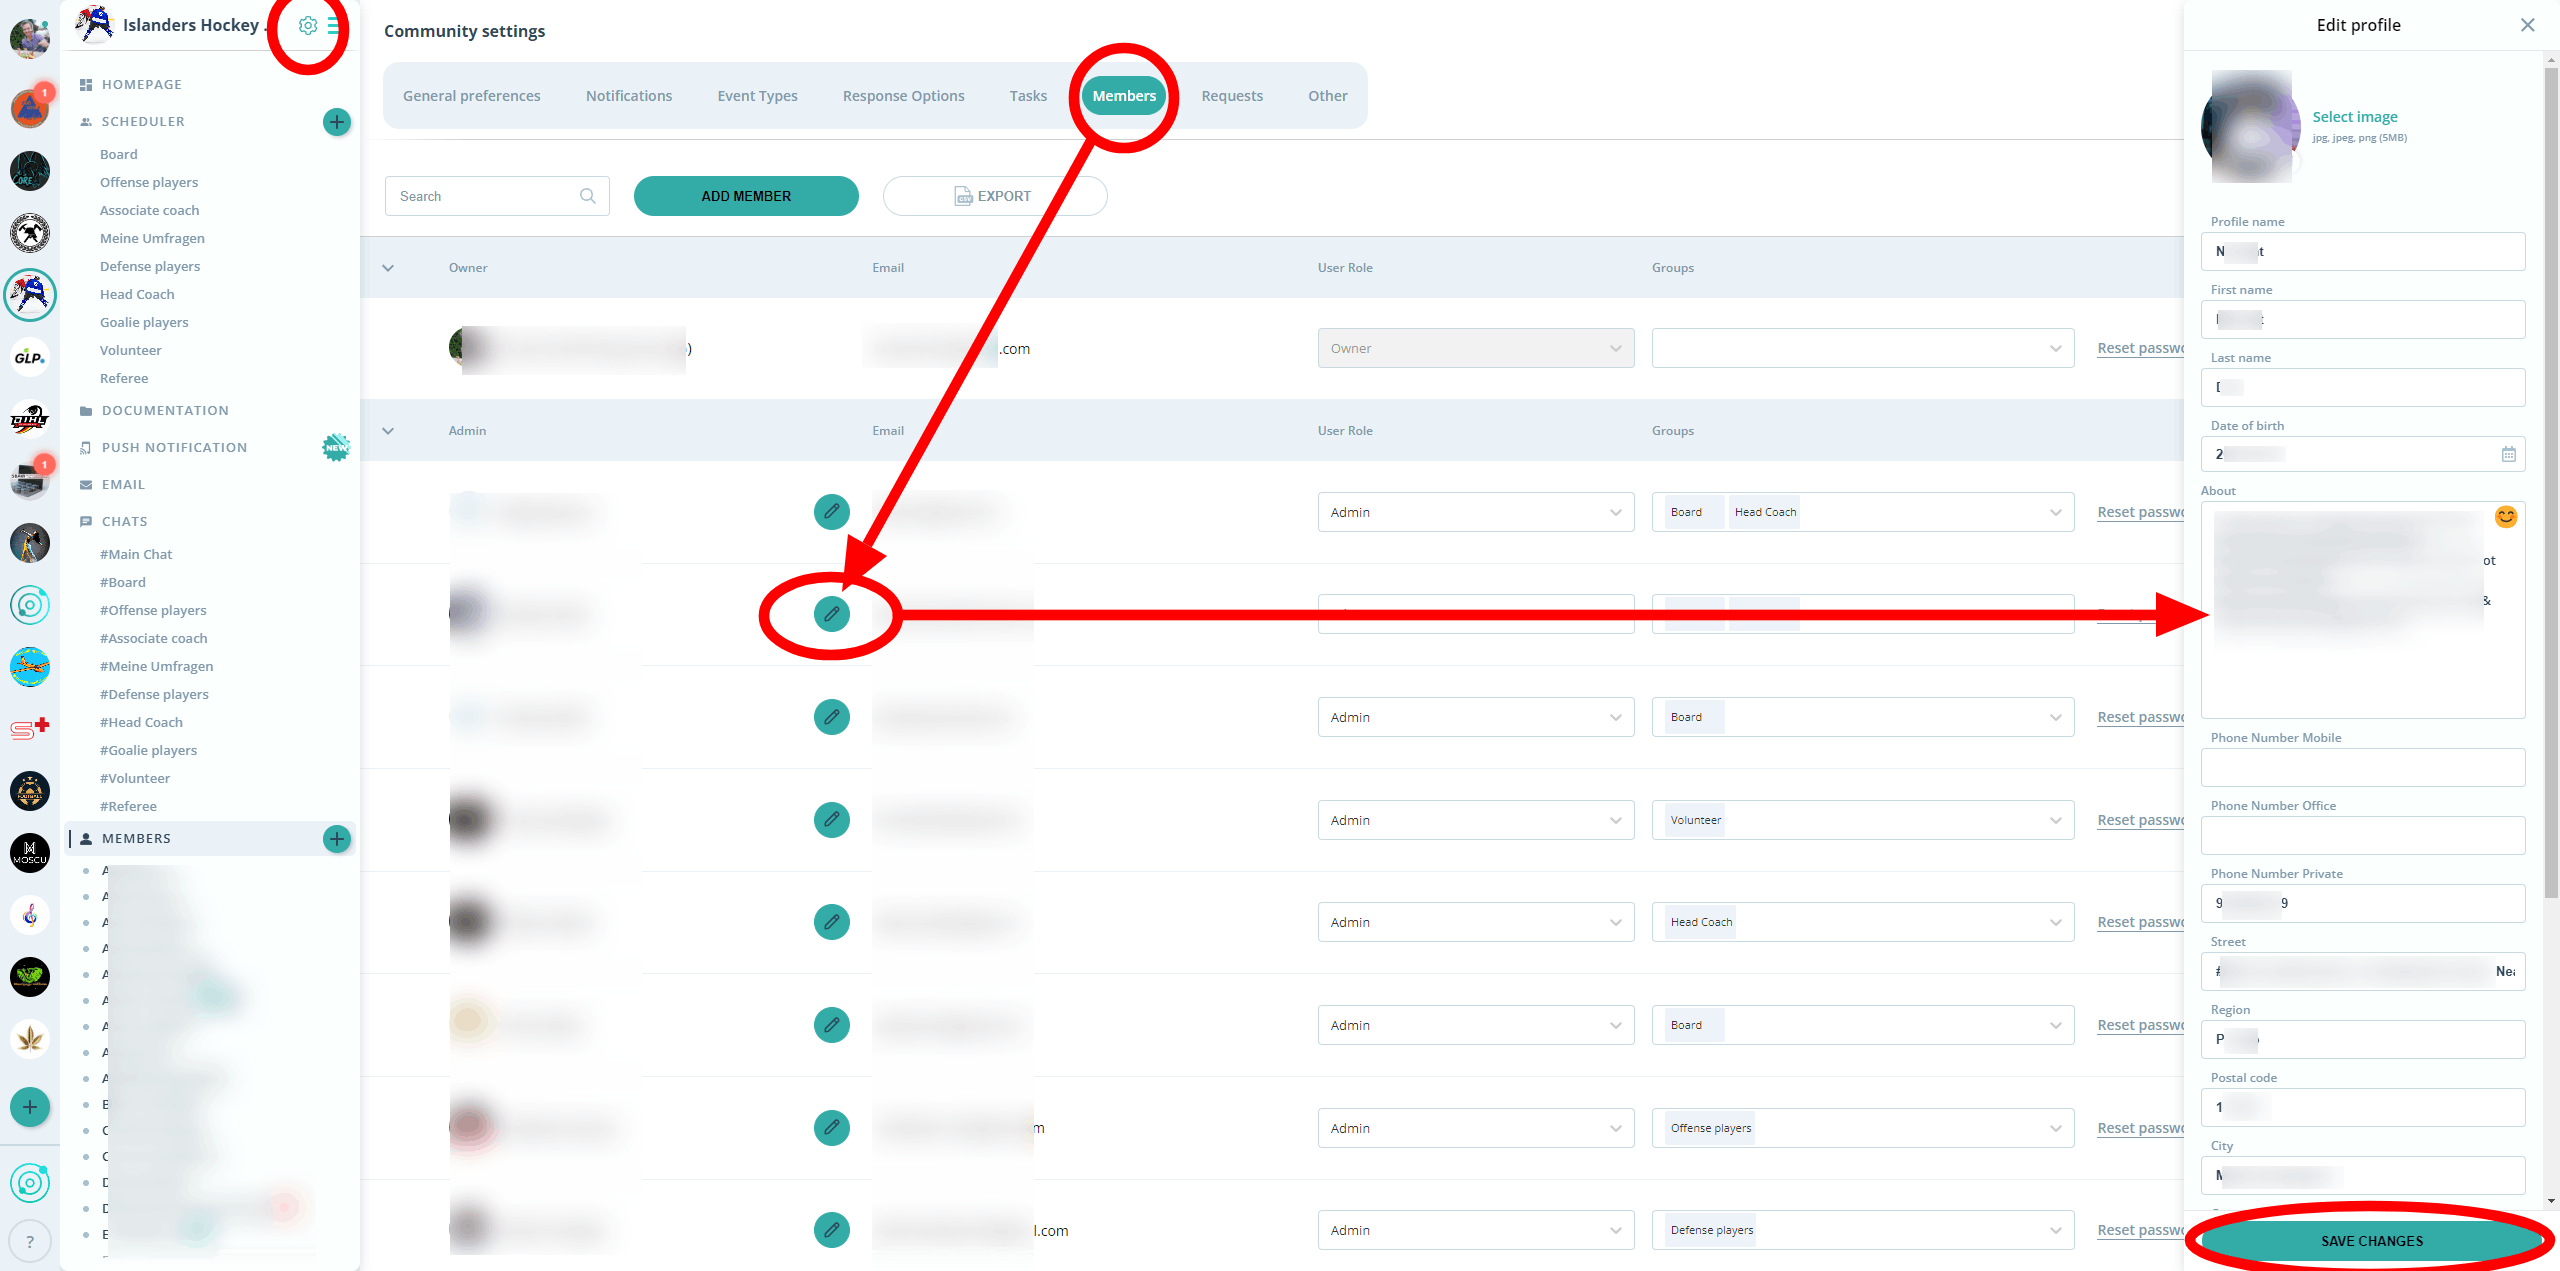
Edit Member Profiles 🖊️
Update members' personal information.
- How to: Edit Member Profiles
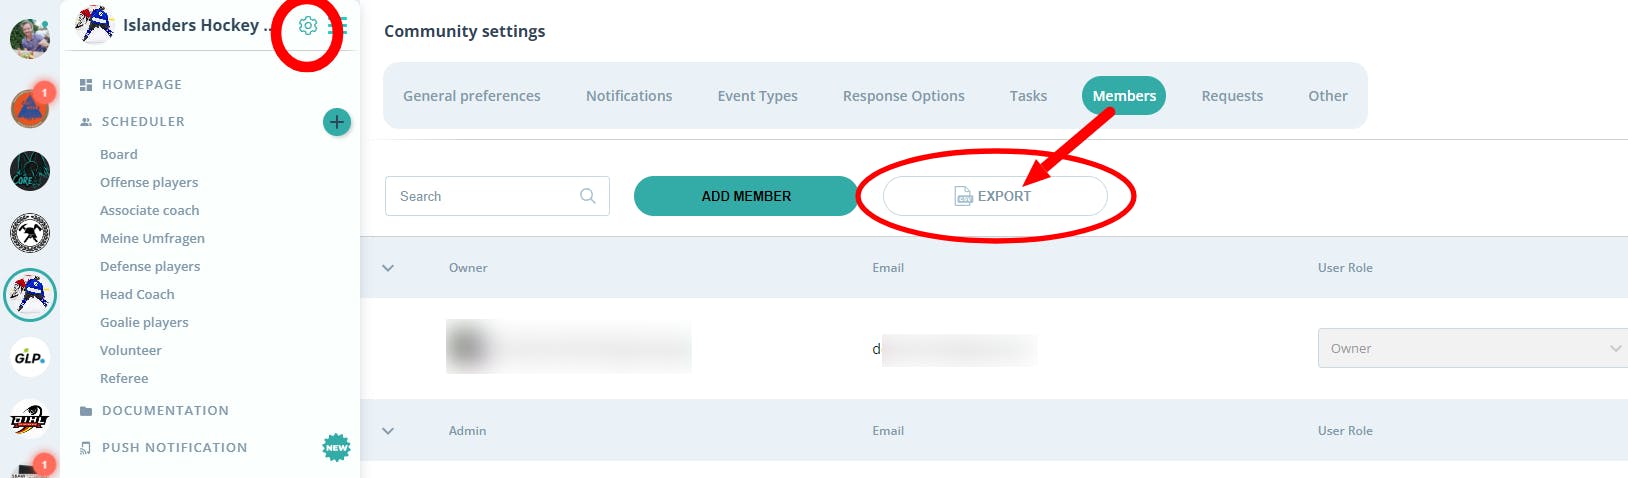
Download Member Data ⬇️
Easily export all member information as a CSV file for Excel or other programs.
Roles & Permissions
Learn about the 4 different roles in Gumb and their permissions.
- Details: Roles and Permissions
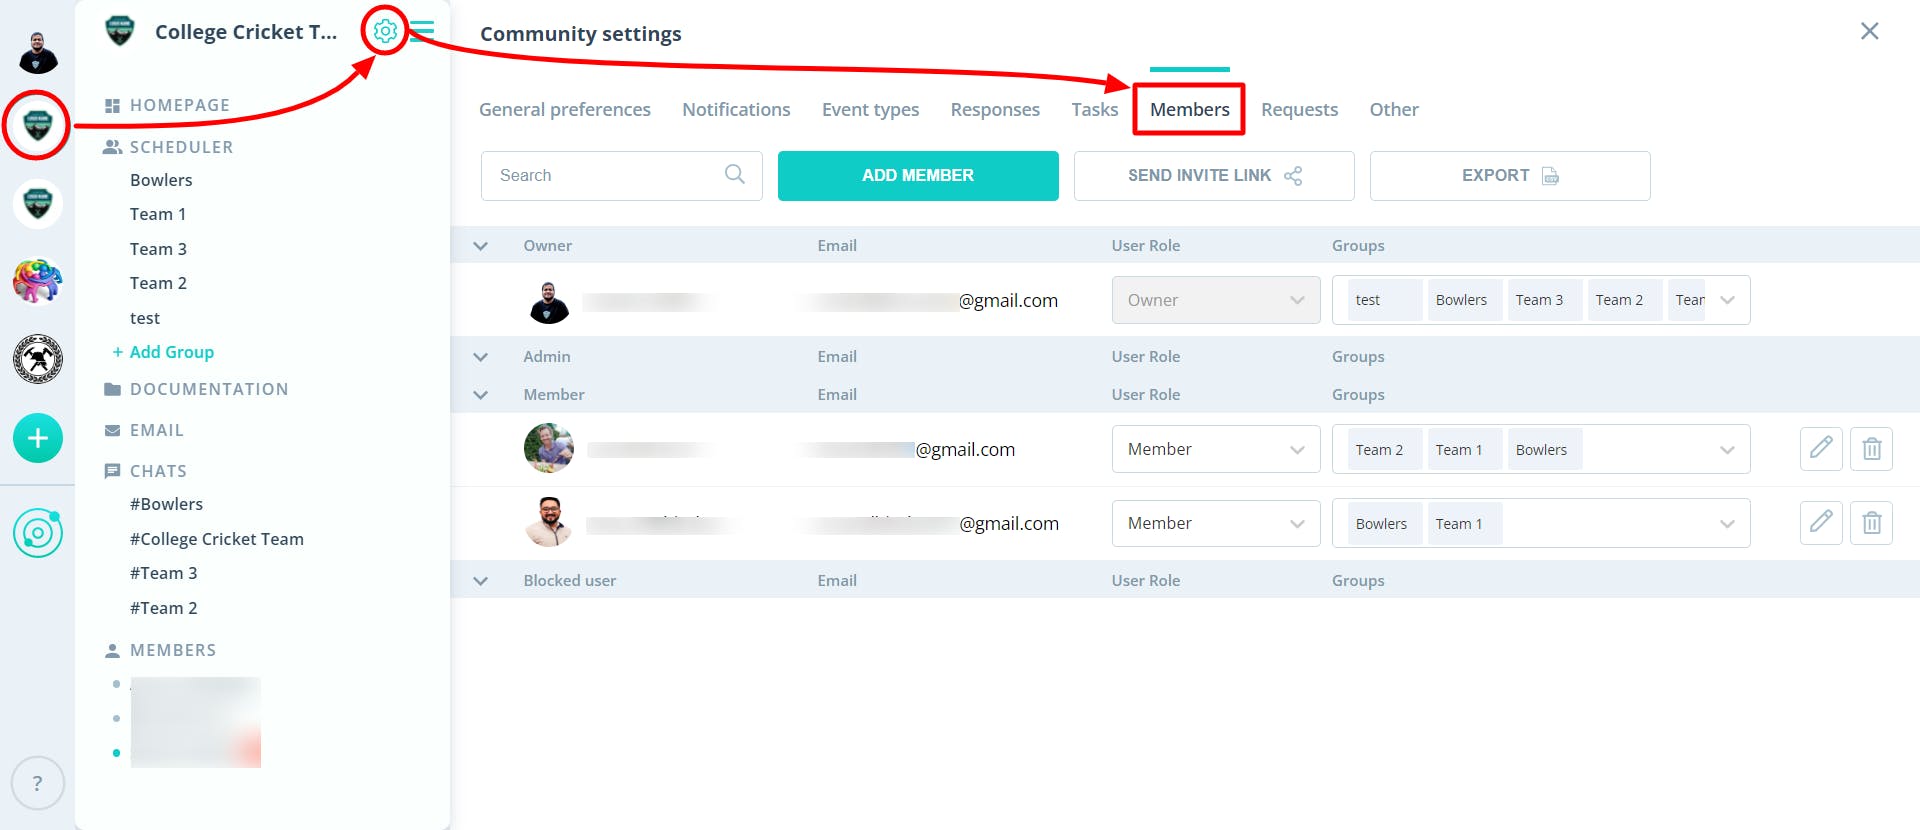
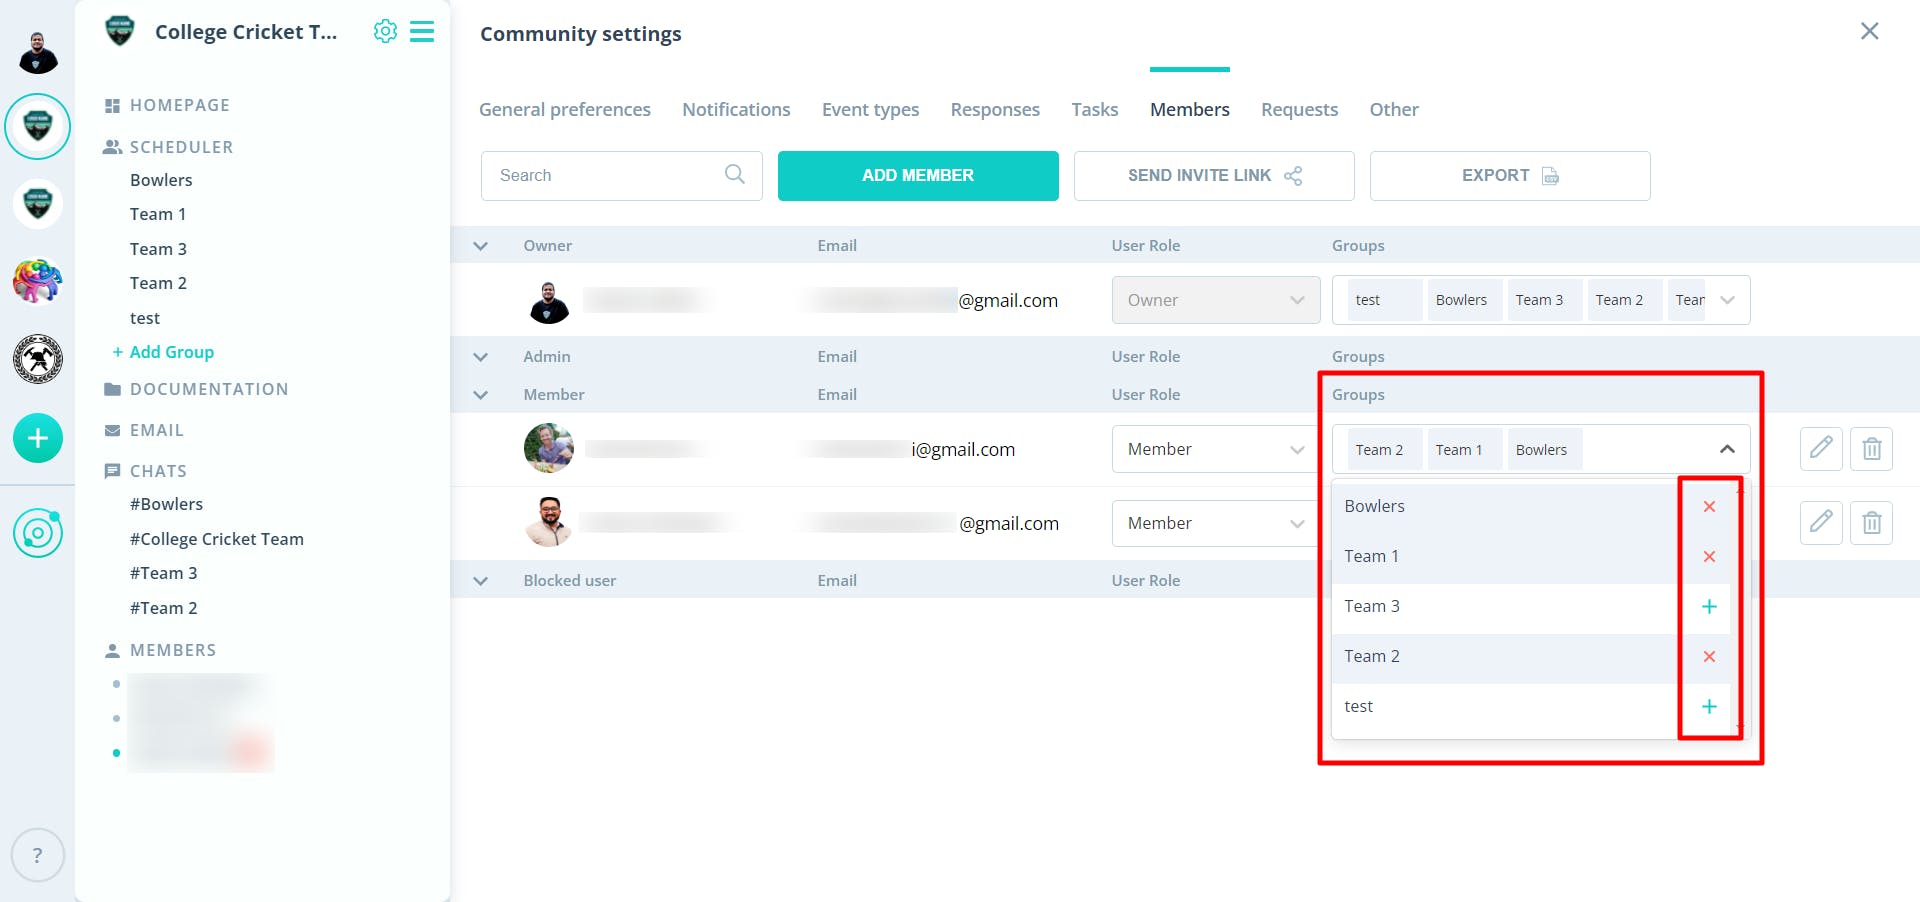
Assign Admin Rights and Manage Groups
- Open your community.
- Click on "Community Settings" (⚙️).
- Select the "Members" tab.
- Admin Rights: Change roles using the dropdown menu next to the member's name.
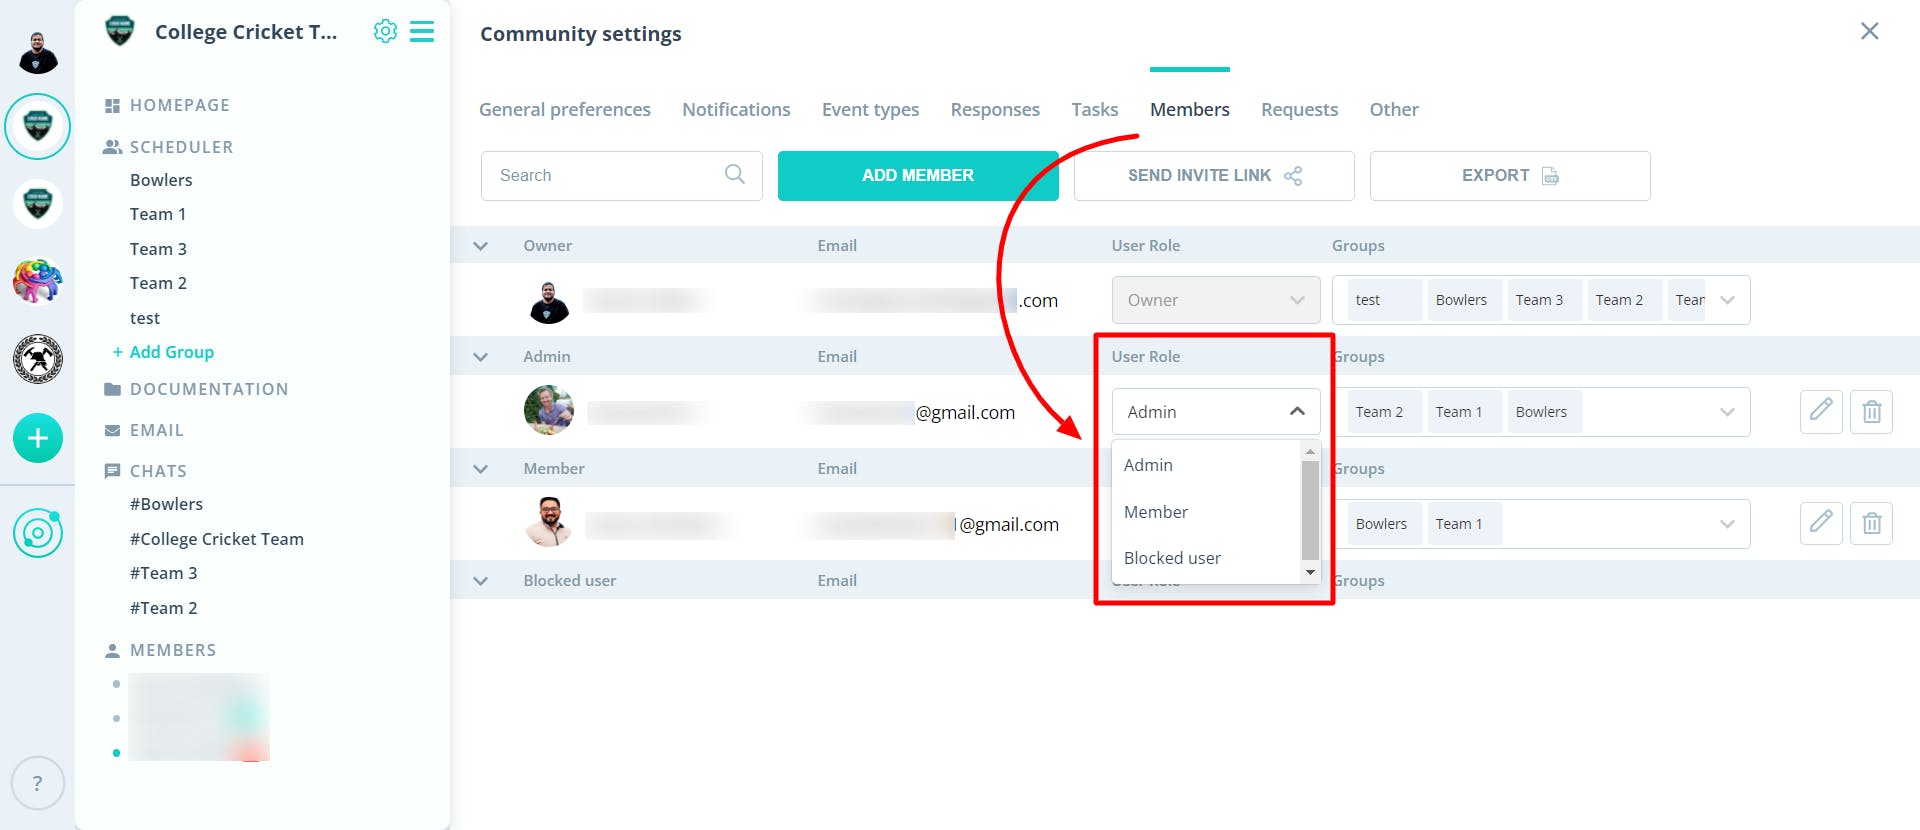
- Groups: Add or remove members from groups using the dropdown menu under "Groups."

Important Notes:
- Changes usually appear instantly. If not, refresh the page (Mac: Cmd+R, Windows: Ctrl+R).
- Our 2021 membership management videos are still helpful, even though we've made some updates since then.
Membership Management on the iPhone (iOS) 🍏
Should you have any questions or require further assistance, we're here to help → Contact form.