
FAQs
Assigning tasks in Gumb 🧩
Many admins already know how to create tasks — see how here. And here you'll learn how to assign specific tasks to members.
✅ How it works
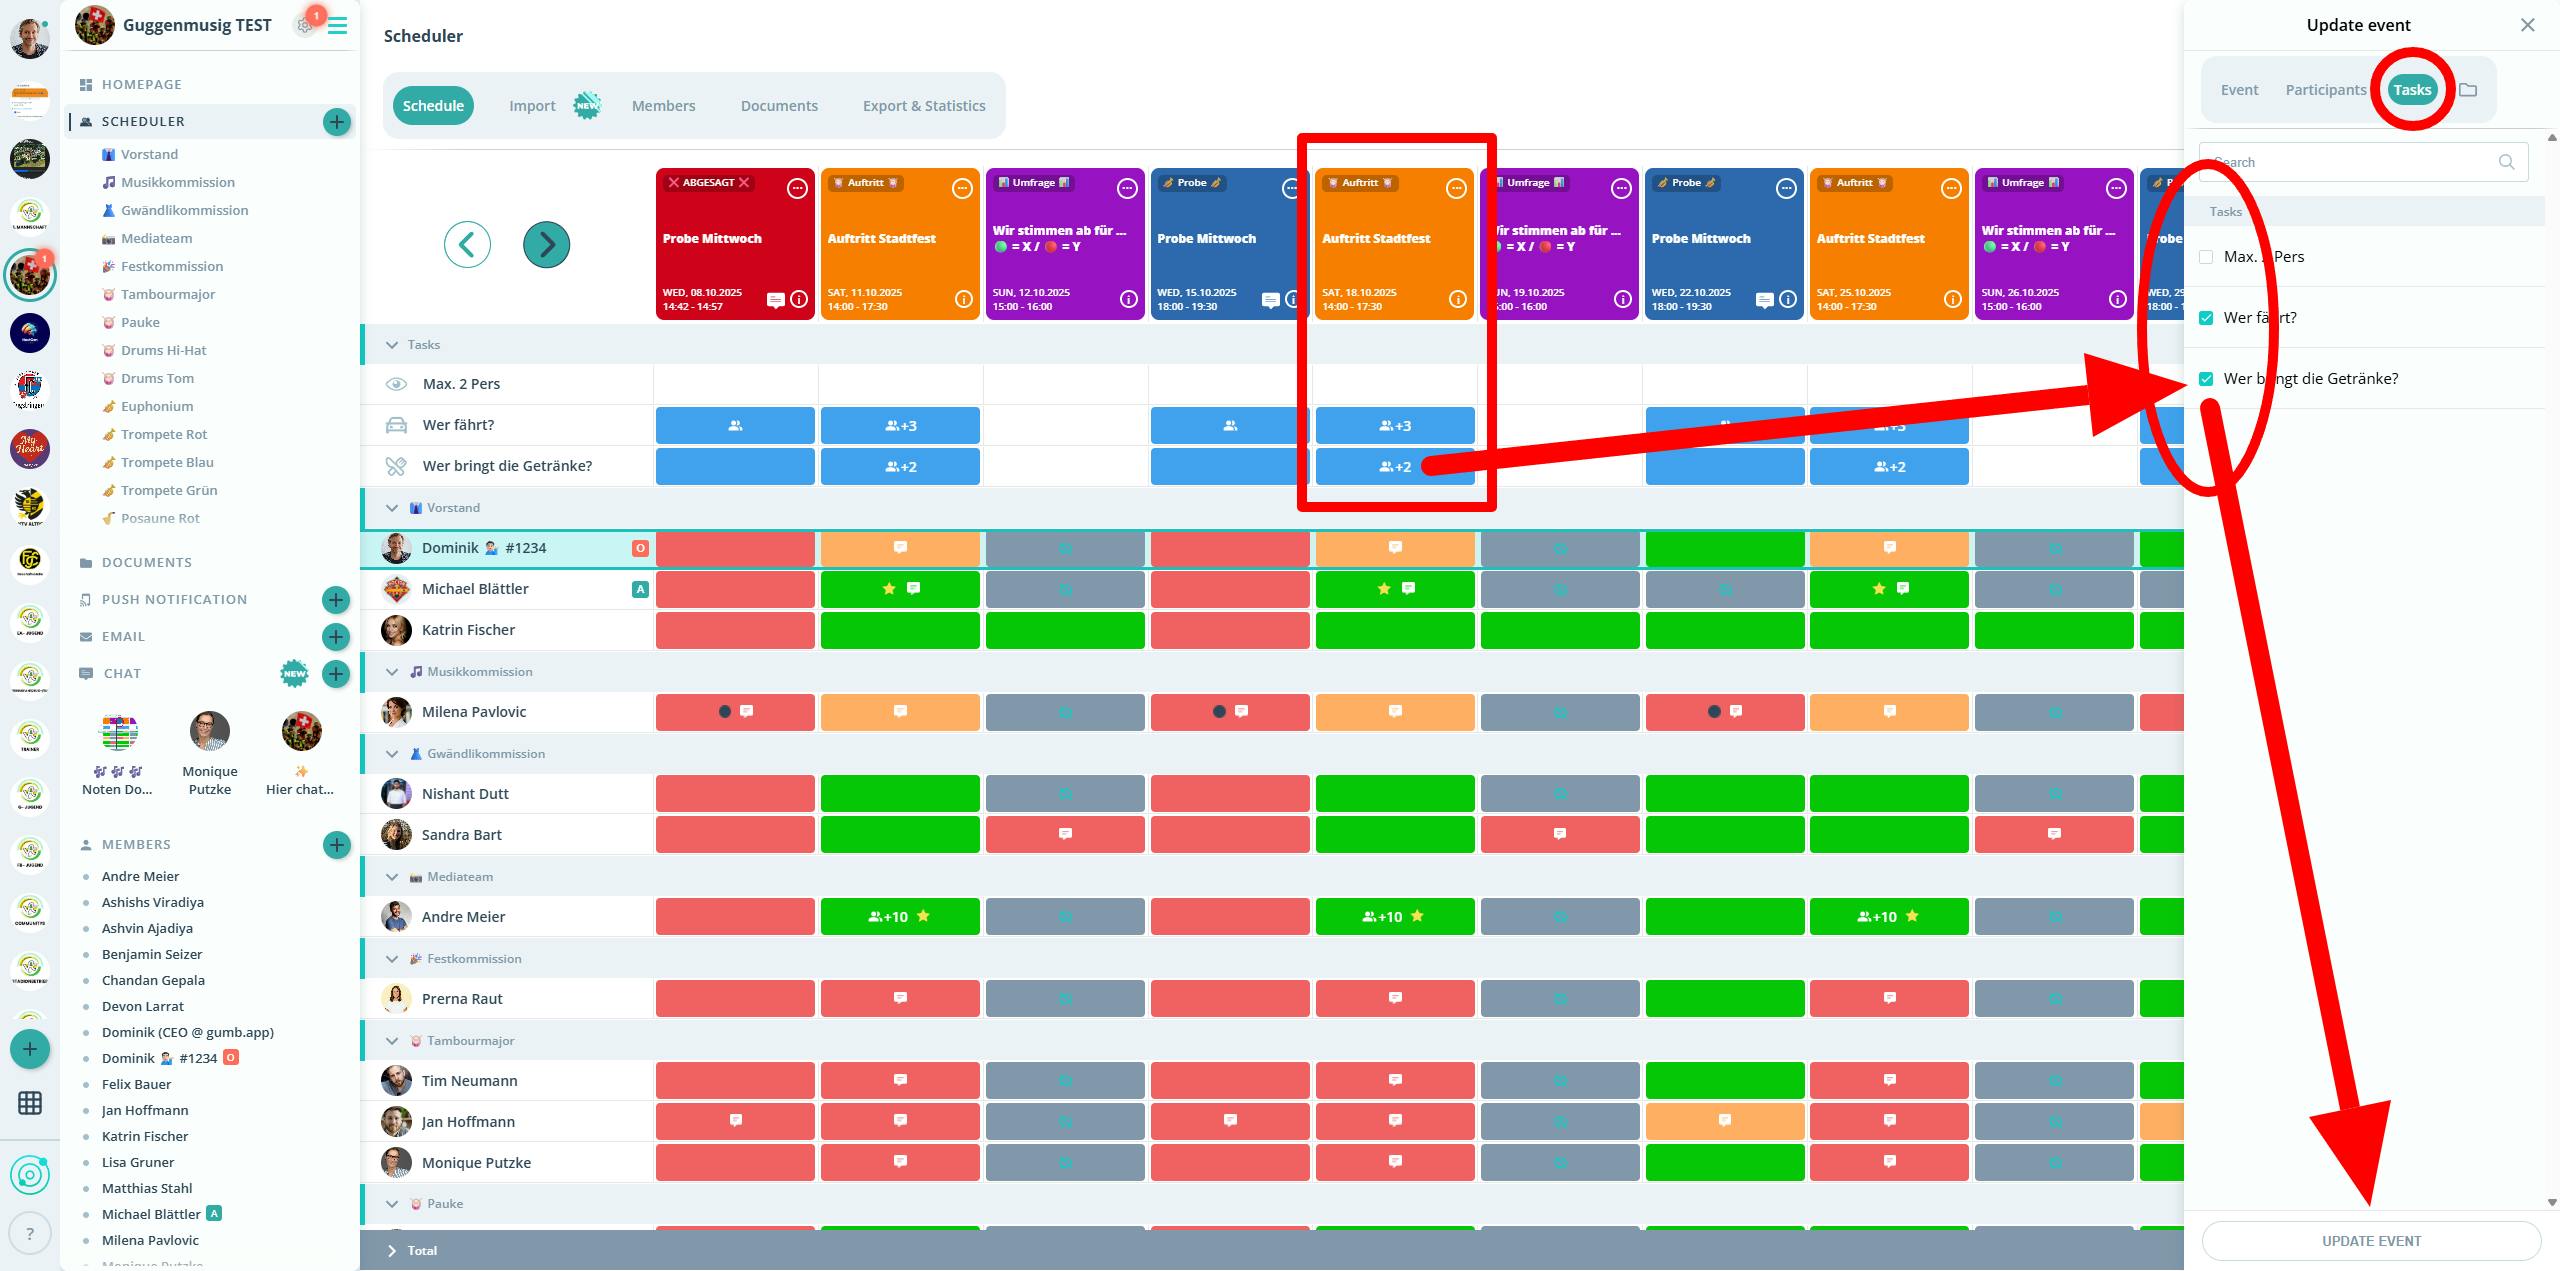
- Activate the task:
Make sure the task is active.
🔵 Blue = visible, ⚪ White = not active. - Member must have responded:
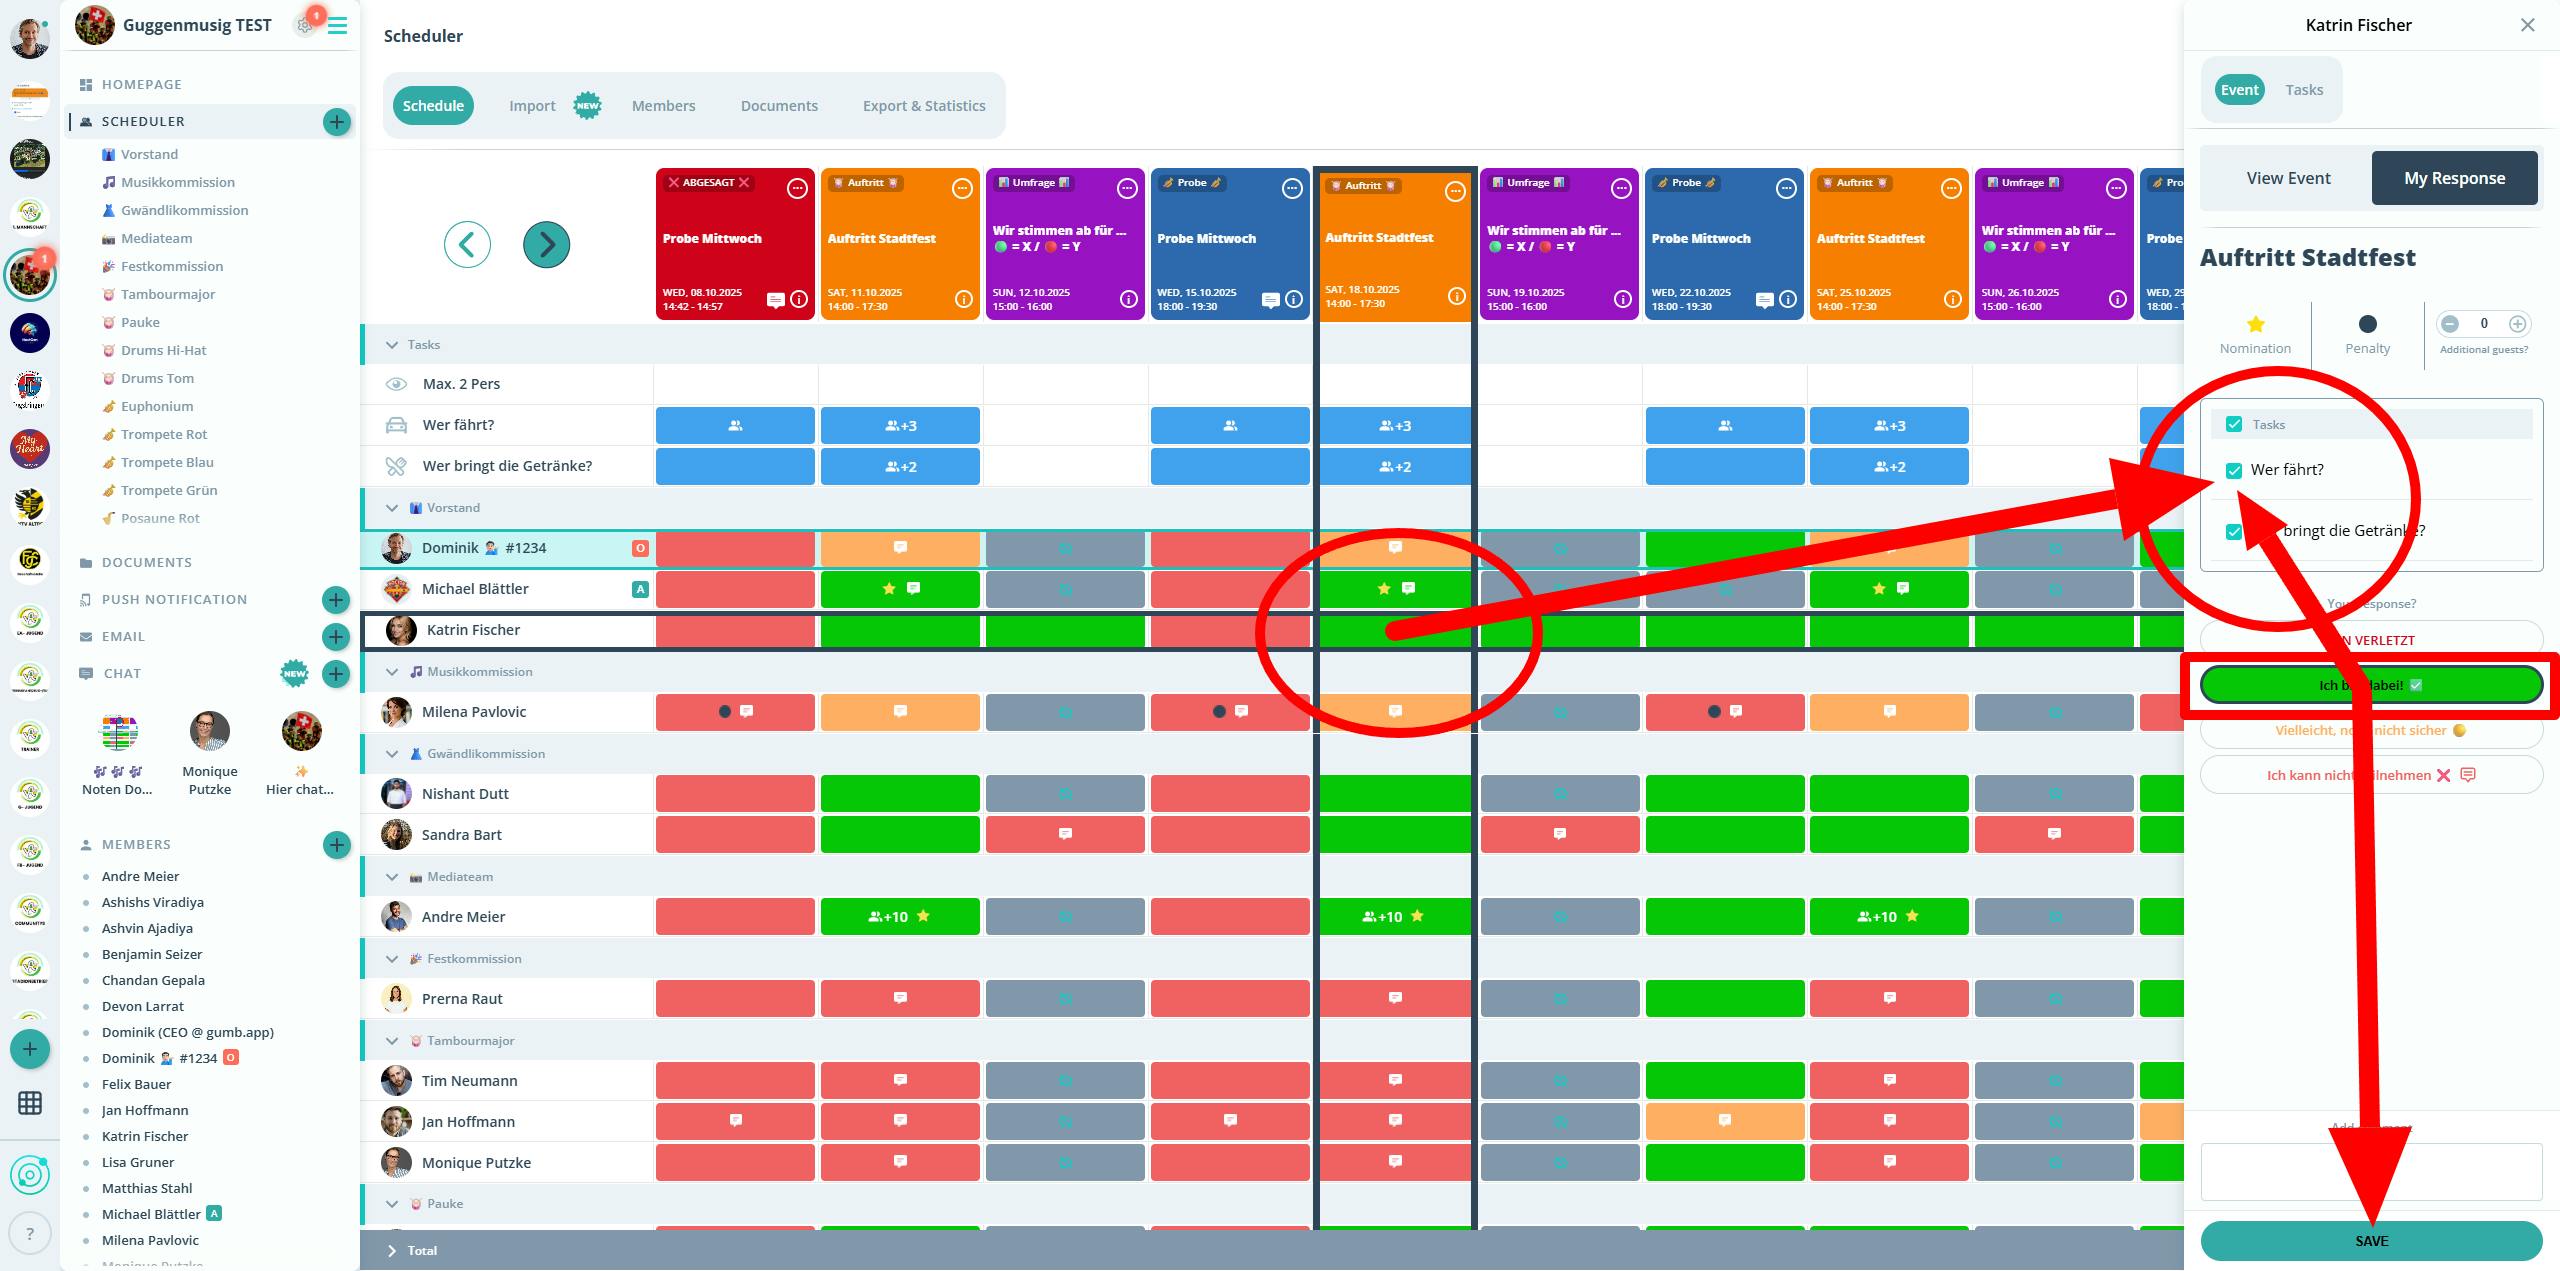
Click on the member’s response (e.g., “Yes, I’m coming”).
You can only assign a task after the member has responded. - Assign the task:
In the top-right corner, check the box under “Tasks.” - Save:
Click Save at the bottom. - ✅ Done — the task has been assigned.
📸 Activate the task:
(click on the event or task)
📸 Select the member & check the box — then save.
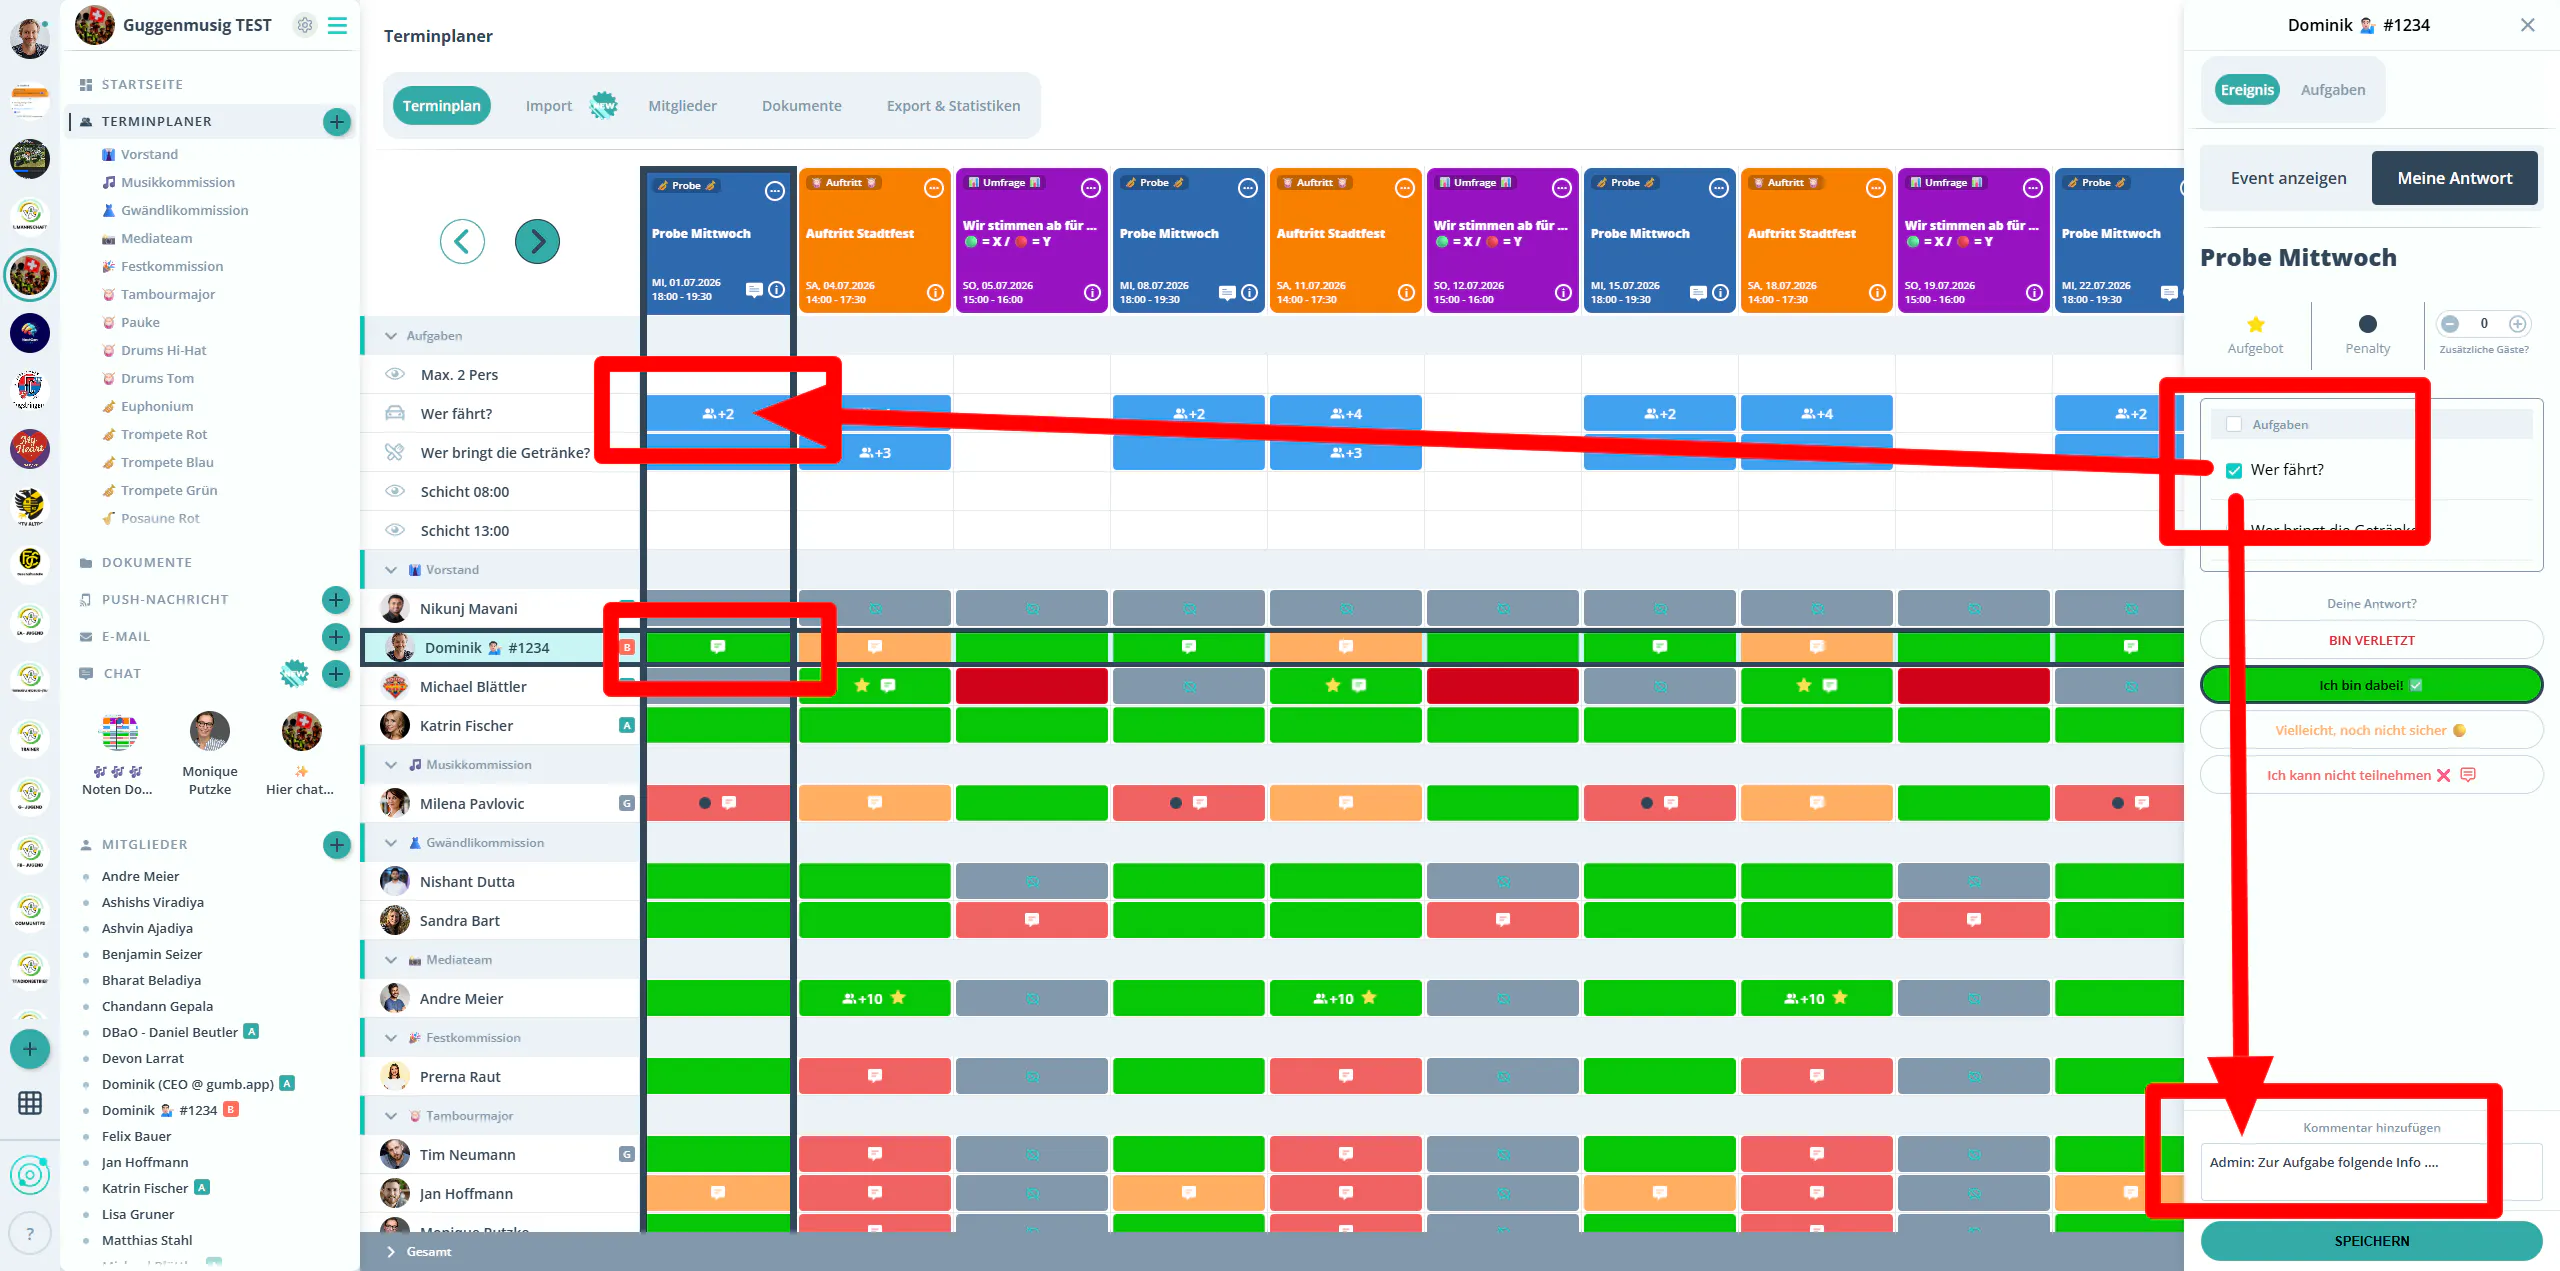
💬 Add a comment per member
Right below the task checkbox, you can leave the member a comment for this specific event — e.g., "Setup from 2 p.m., south entrance". The member sees it under "My Appointments" and on their phone.
Note: There is one shared comment field per member and event — even if several tasks are assigned.
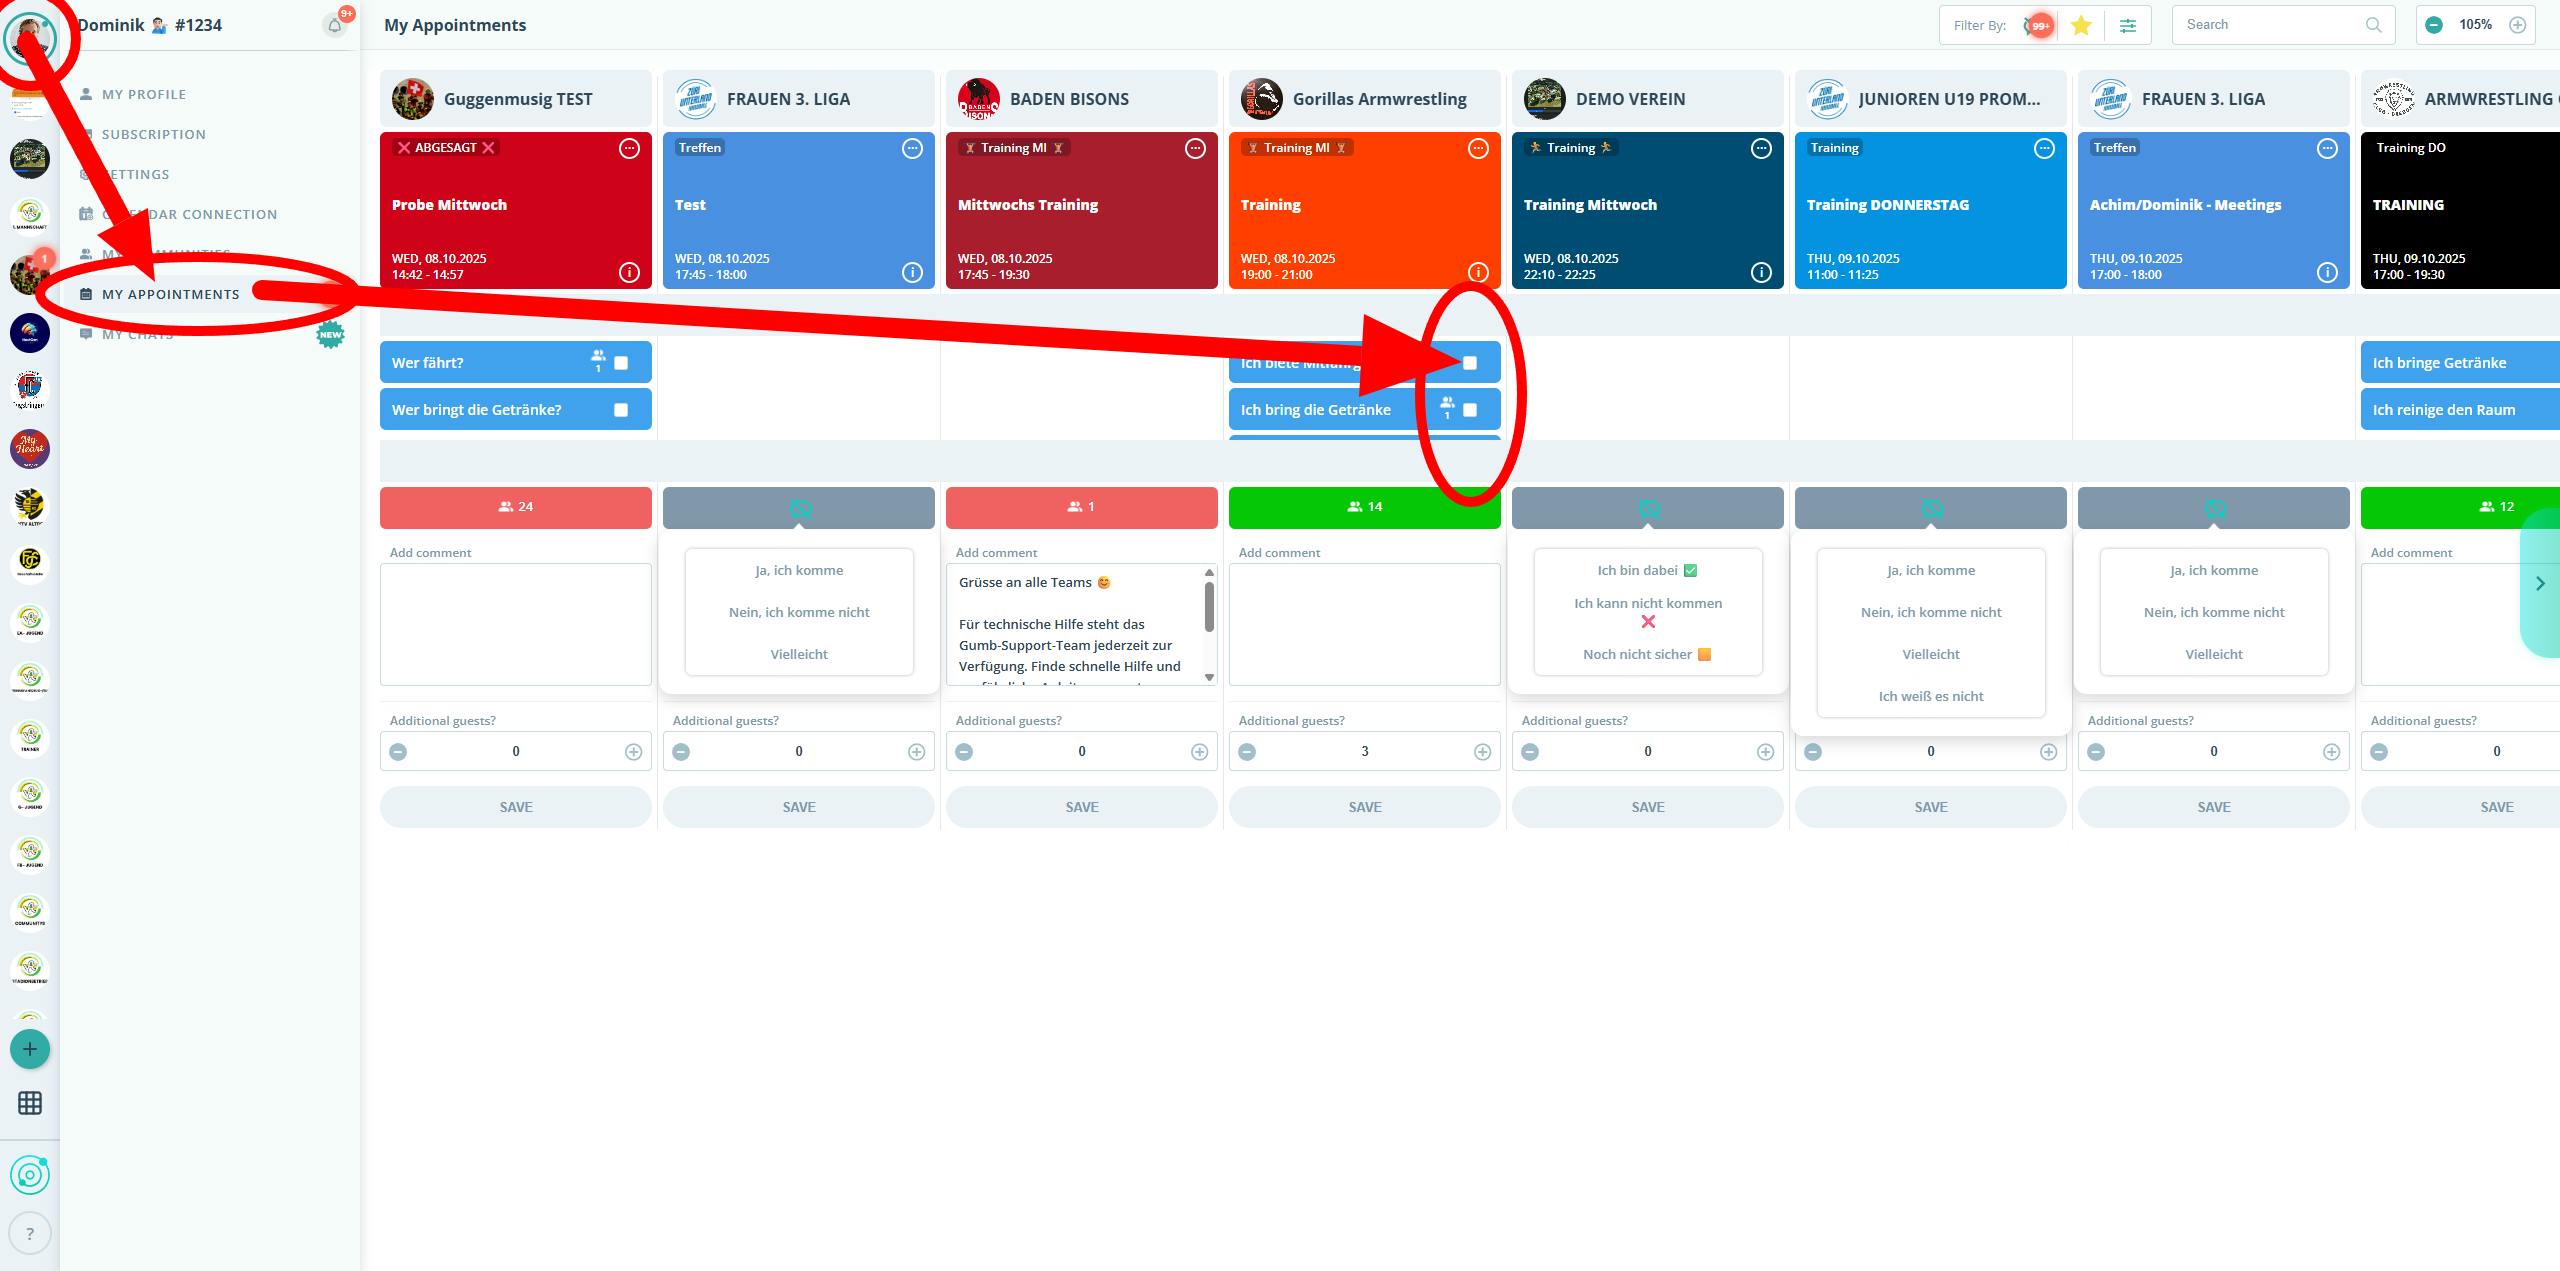
👥 For Members
Members can accept tasks the same way (directly in the scheduler) or via their profile under “My Appointments.”
They immediately see which tasks have been assigned to them.
Questions?
Reach out at support@gumb.app, use our contact form or visit our help centre at gumb.app/en/support.